I'm creating this post because there wasn't really a consolidated step by step on how to get from the GPS SD memory card (or MMC as Lowrance calls it) to the computer, to the correct file type and then to a presentable fashion in Google Maps.
Step-by-step:
1. Save your trail data to the memory card by going to Menu -> System Setup -> Transfer my data. Choose Save, then name the file and choose Save Data.
2. Remove and plug in your memory card to a card reader connected to a computer
3. Copy the previously named .USR file from the memory card somewhere on your computer
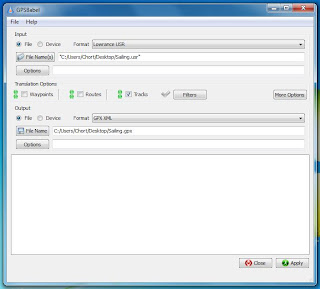
4. Download, install and run GPSBabel (free). For the input file select Lowrance USR and locate the file on your computer. For the output file, select GPX XML and name the output file. In the Translation Options section you can choose what types of data you want to convert and in this case all we're interested in is Trails. Under More Options I like to check Preview in Google Maps, just to make sure I have the right maps before proceeding. Click Apply.
 5. Go to www.gpsvisualizer.com and choose your converted GPX file.
6. From here I like to see which trails I actually want to show and if any manual data modification is necessary. Then I use a text editor, Notepad++ if you don't have a favorite, to make the fine tune adjustments before repeating step 5.
7. You can download the map for local desktop use only, send a temporary link to your friends, or request a Google API Key and replicate the map on your own site like I will hopefully do in the next couple posts.


Enjoy!